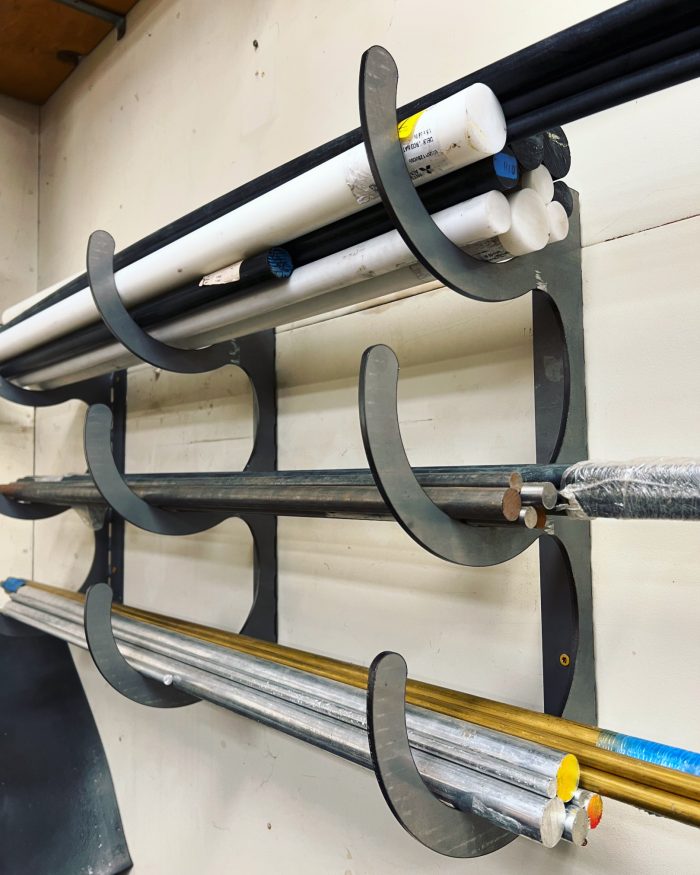
First project in the new shop – an organizer for the various bar stock material I use in the machine shop portion of my space. For years, miscellaneous Delton, aluminum, teflon, steel, titanium, brass, etc. rods have stood in corners, been tucked behind machines, sitting up in rafters with no real permanent home, waiting to be used but by bit in the lathe. I decided it was time to dedicate some space, time, and attention to finally organizing them all.
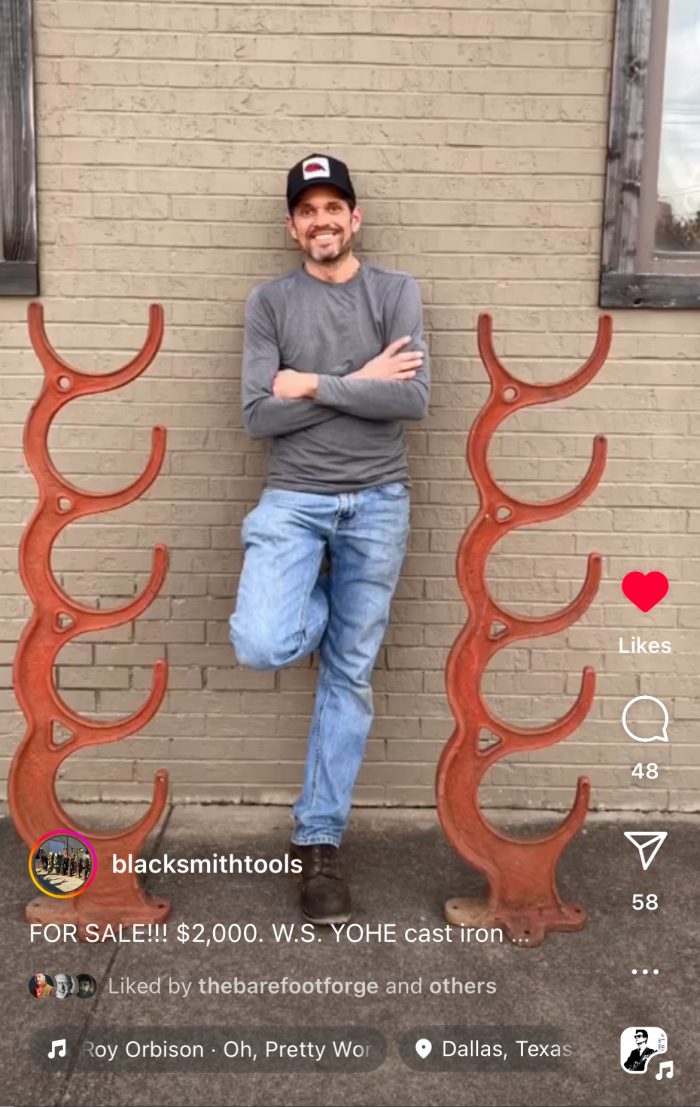
I spent 10 minutes at lunch last week drawing up a design in AutoCAD that I sort of copied from antique cast iron pipe racks. I know someone who sells them, but antique ones are WAY outside my budget.
I ordered three sections for me and three for another machinist friend who was interested in a set for himself after I showed him my drawing from SendCutSend and BAM! they were sitting at my door three days later. I do love SendCutSent! I bent them up in my SWAG press break and hung them up in the shop in a span of 40 minutes. Sure quick and simple.
Am pretty proud about how they came out!
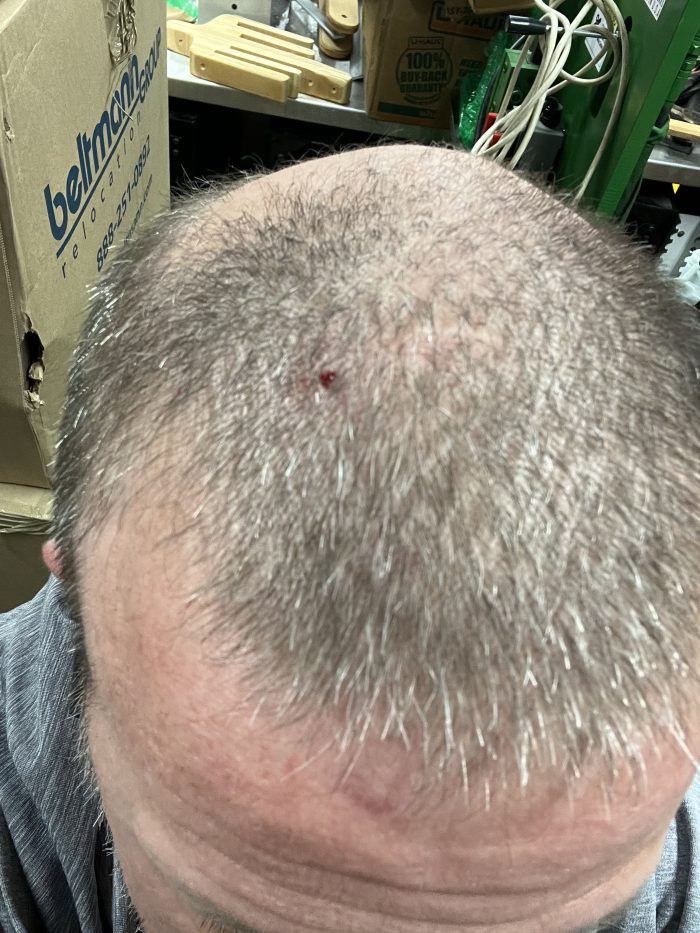
Rack installed and filling up!The inspiration for my design from my friend @blacksmithtools on InstagramI did soak my head, bleed, and say dirty words during the install process.
Man, I have a LOT of tools! That is not a brag or ego, it is a statement of fact. They are all really heavy as well! I was reminded of this recently after accepting a job 900 miles away and figuring out the logistics of moving my shop.
Tools tagged for loading on the 26′ truck
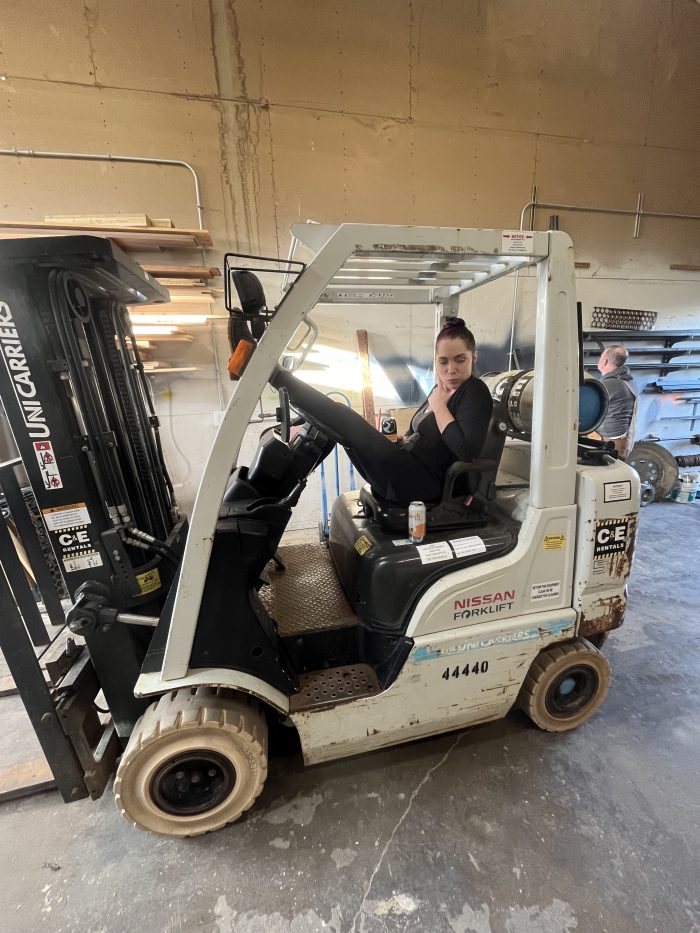
Forklift rental on both ends of the move was the key!
Loading and unloading the power hammer was NERVE RACKING!
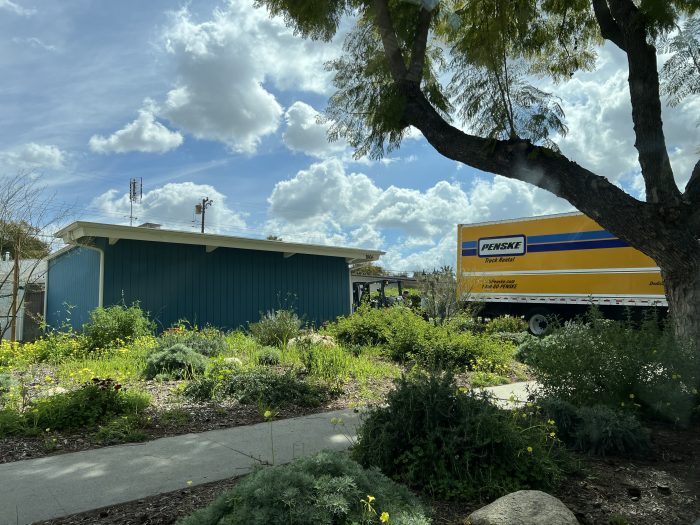
While our house and vehicle move were paid for by my new company (I am an Aerospace Engineering Director for my day job), my shop/tools/material was on me to move, and I was a little overwhelmed initial at the logistics and truncated timeline.
My dear friend Mark flew in from Colorado, and we had everything packed up in a 26’ Penske truck like a Jenga set. The truck was rated at 26,000lbs GVW for the type of license I have (Class C) and we weighed in at 34,450lbs, less that the vehicle’s true capacity, but still REAL HEAVY! I was also pulling a tandem axle trailer with my 1986 CJ-7 on top of it. Driving the mountain passes from Eugene to SoCal was not fun in any single sort of a way!
I could not have done it without Mark. He followed behind in the FULLY loaded Subaru with a heavy trailer for the whole drive south and was amazing in general! He out worked the team of movers I hired to help load and the team on the other end I hired to help unload. A BEAST!
Car are trailer were also heavily loaded!
I will post some pictures of the new shop as I get it sorted and set up – there are two actually. I was lucky enough to find a home in in Orange County that was built by a machinist that had is 20X22 shop semi-legally in his back yard. My forge and fabrication tools are going in there and my cabinet shop will be in the 2-car garage. Yes, my wife is awesome!
Our friend Tina chilling on the forklift after showing up on move night with pizza and beer!
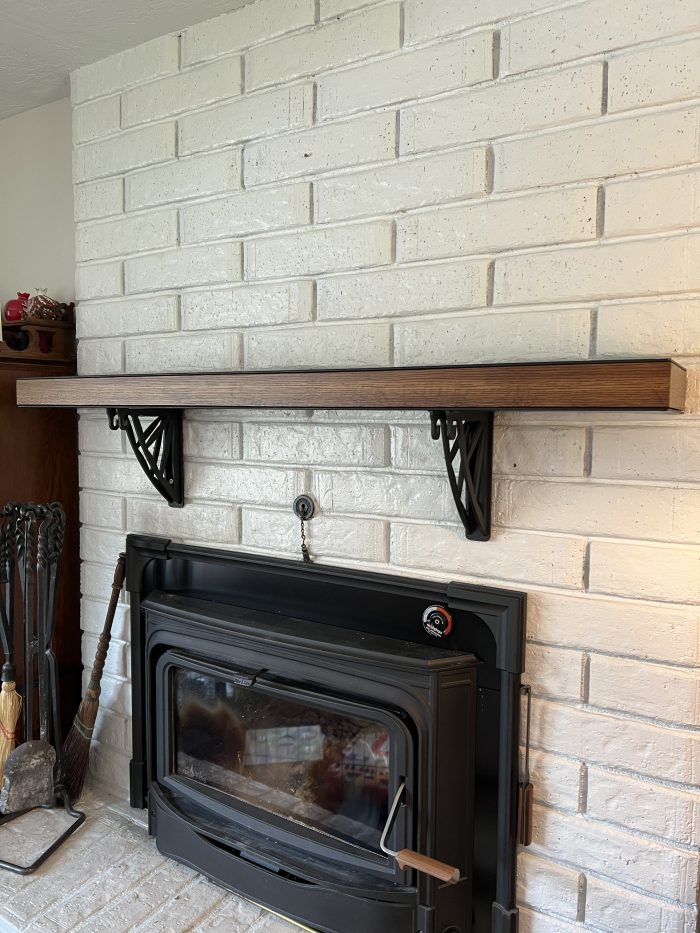
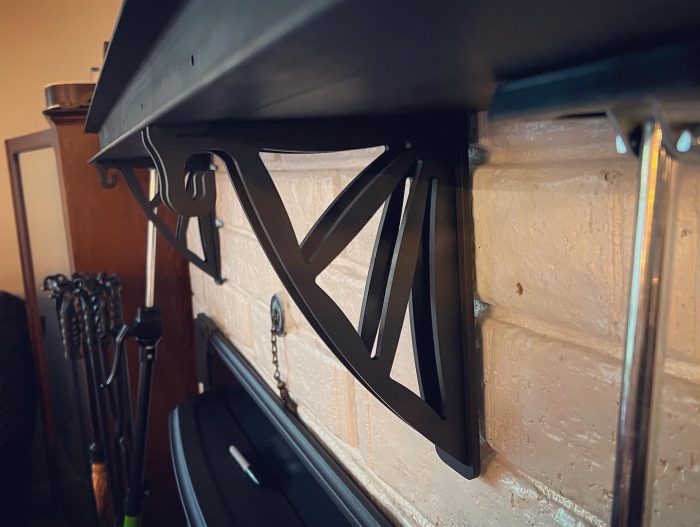
Goes really well with the brick style, whitewash and the insert design
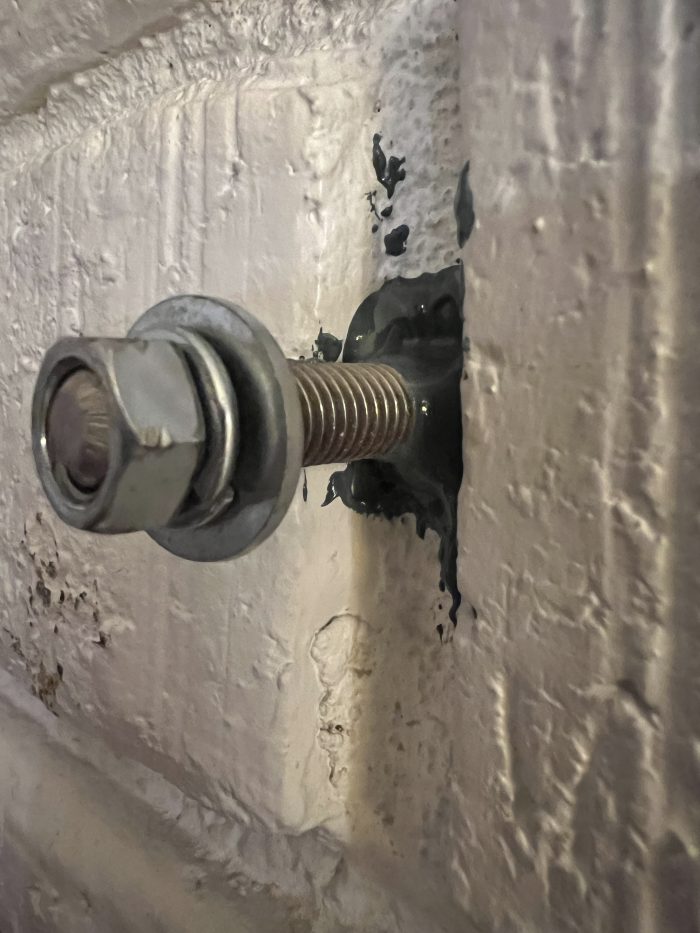
It took WAY too long, but the mantle project is done as it was a filler between other projects with no wanted finish timeline. I really like how it turned out. Steel and oak (from when I lived in France) with custom support/stocking hanging brackets, epoxied to the wall with all thread and the internal filled with koawool to keep the mantel surface cool so not photos are damaged or candles melted when the fire is going.
First, forgive the pictures, I did not take them. They are from a real estate agent after I misplaced an entire flash memory card. I think he was trying to be artistic with his camera angles. Seriously.
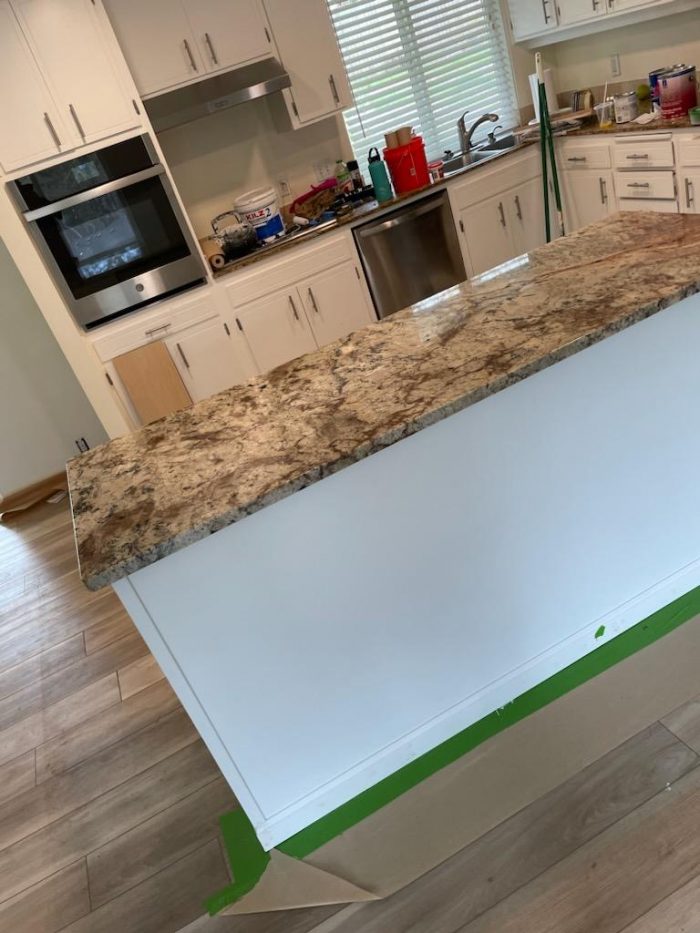
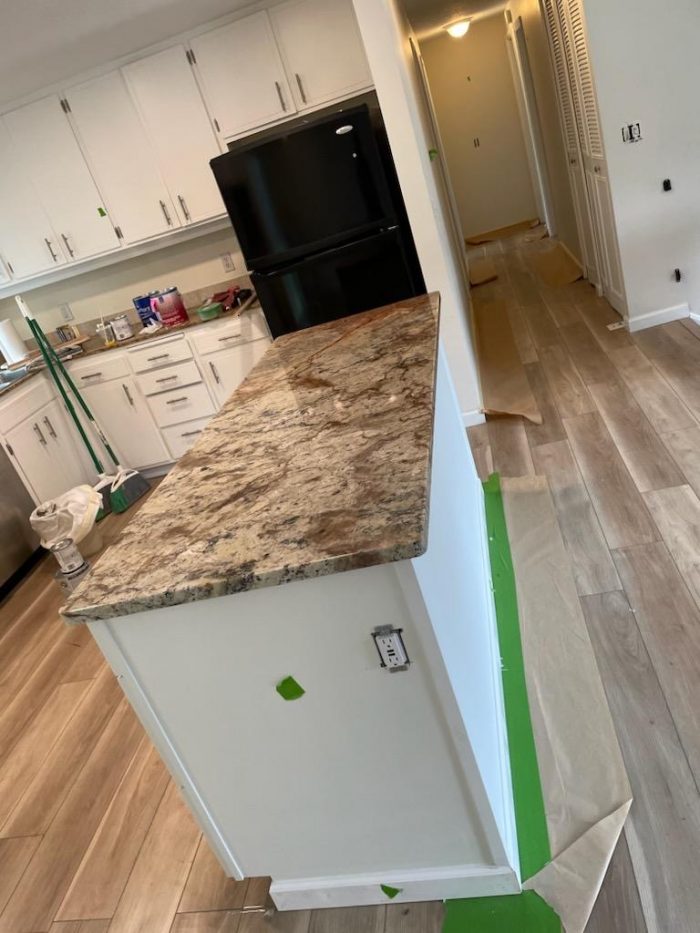
Oh the kitchen island… “The cobblers children have no shoes and the thatcher’s house has no roof.” This thing has been on my list to complete for months in our rental house. I had plans for the cabinets that I sort of obsessed over. I planned for a cookbook cabinet, plugs for the undercounter microwave, and a wine fridge. I was going to do drawers and slides and a set of 4 swivel bench seats. I had three iterations of design – from a notebook sketch to 3D model. All for naught.
In the end, with a tenant move-in date looming, I ended up with big-box store ready-made cabinets, juiced up with trim and wired for just the wine fridge. I put on a remnant granite top – that matched the current kitchen granite perfectly! It looks great. Works beautifully in the house. There is a lesson there that I need to take more to heart: sometimes great and complete is better than AMAZING and not started.
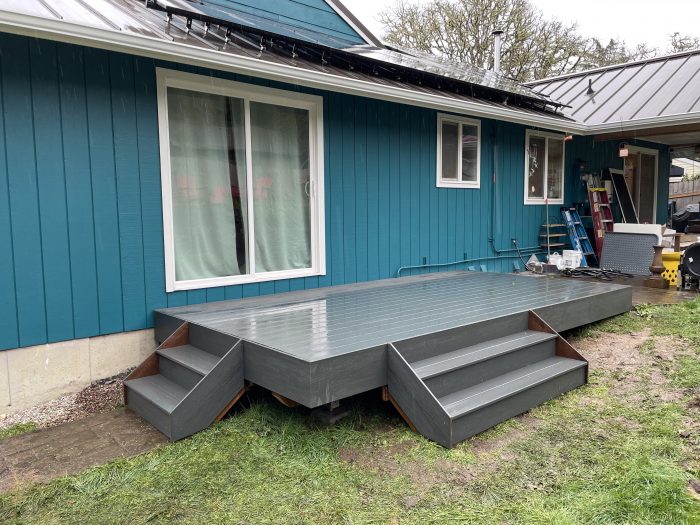
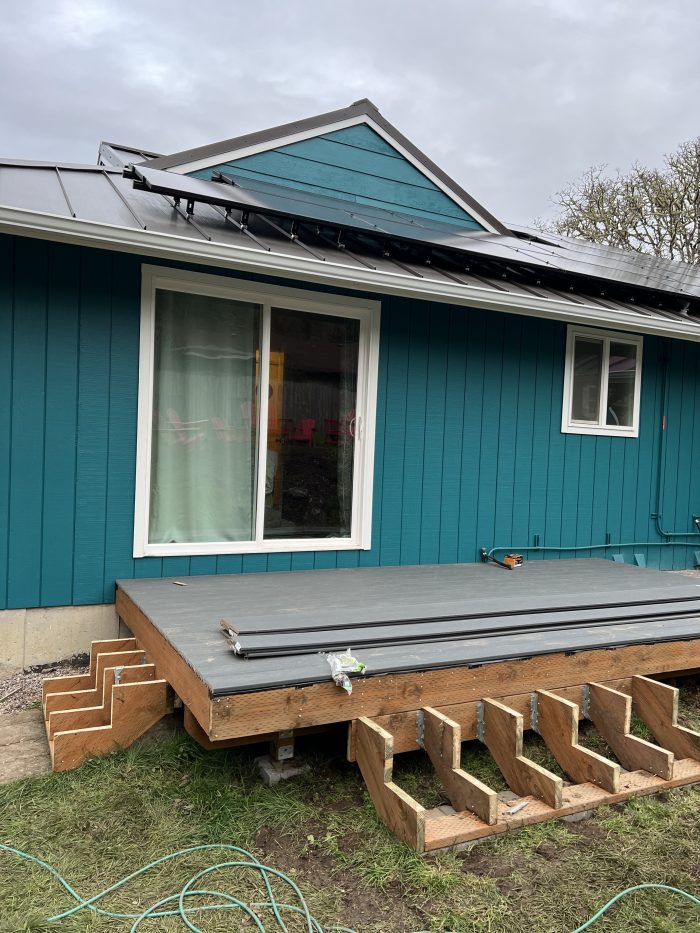
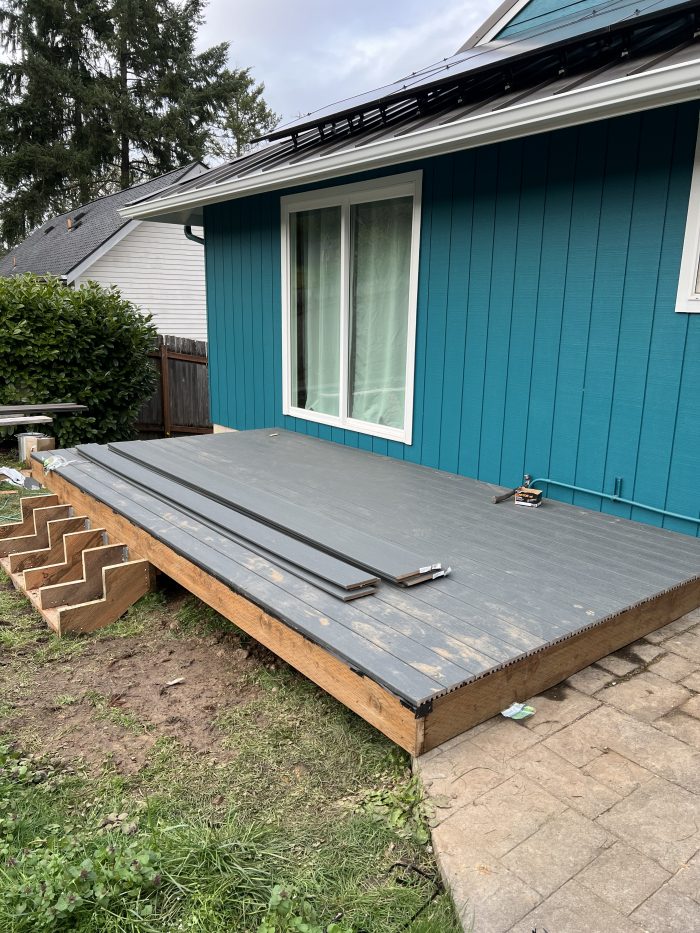
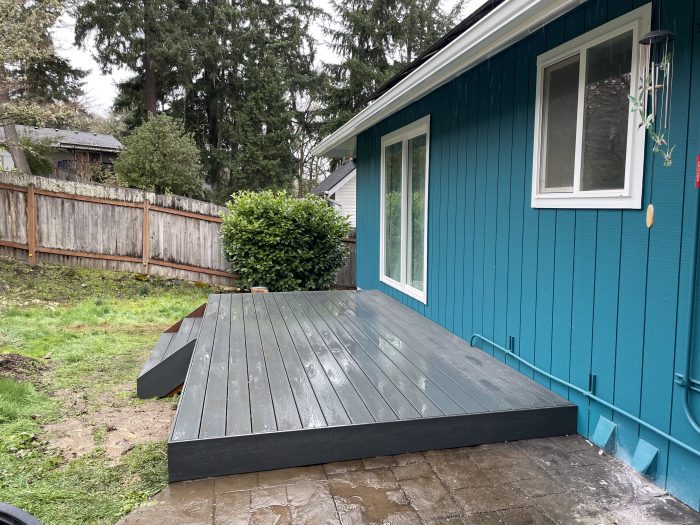
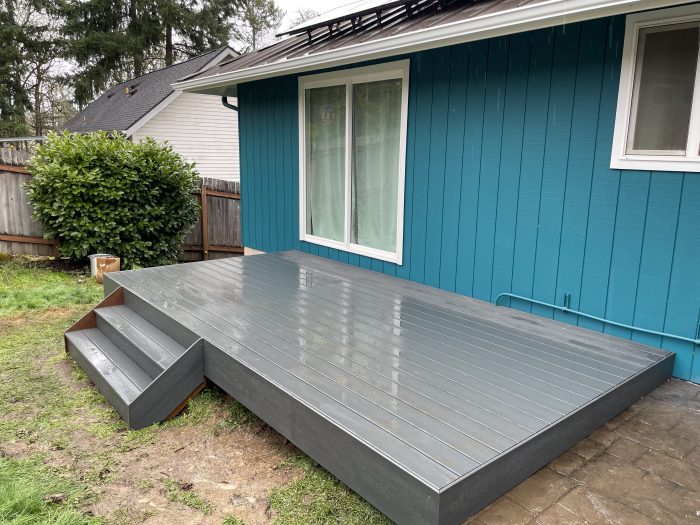
The Trex cover Deck project is complete. The structure is of treated wood, sitting on 12″ centers treated structure. All the joists tops are taped, Simpson ties fitted as intended (see pics below) and stainless fasteners were used everywhere as Oregon winters are hard on decks and exposed wood. We did not install any handrails as it is not more than 30” above the yard. Am happy with build and finish quality. The new deck makes the flow from the master bedroom to outside and onto the grass effortless and it truly adds to the aesthetic and functionality of the back yard.
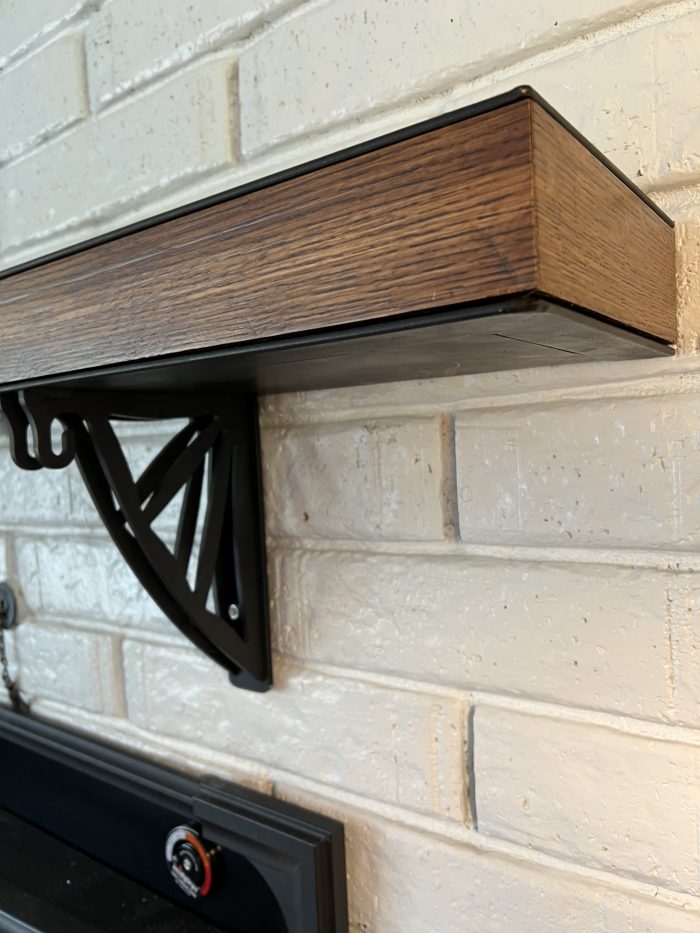
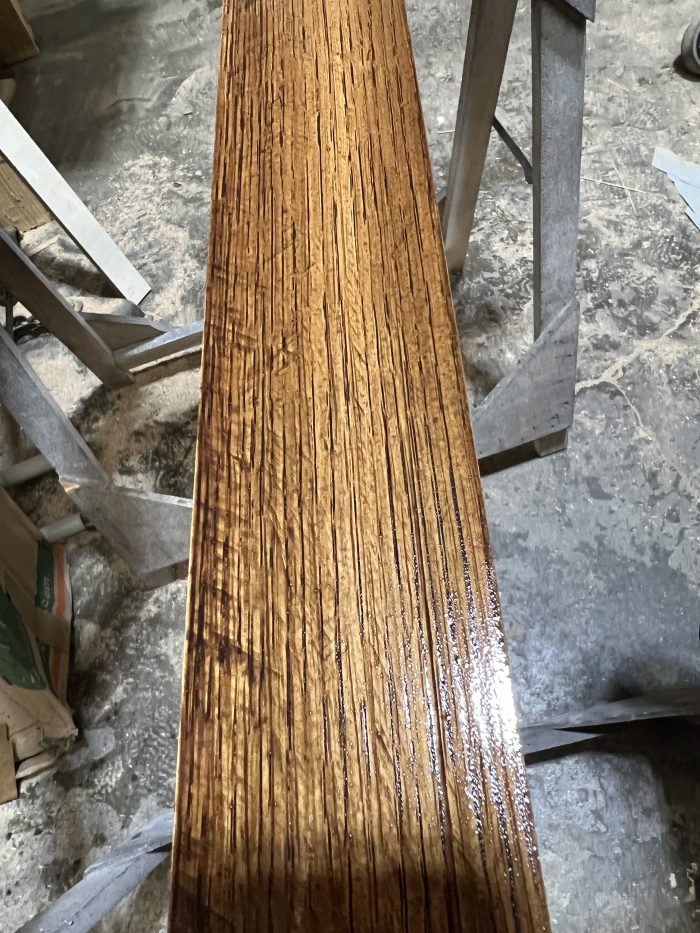
French Oak cut t 10-degrees with a 1/4 round over on bottom corner to fit snuggly in the c-channel. 2 coats of stain and 4 coats of wipe-on satin polyurethane – sanded 220-grit between coatsAll-thread mounting hardware epoxied DEEP into the brick and the wall
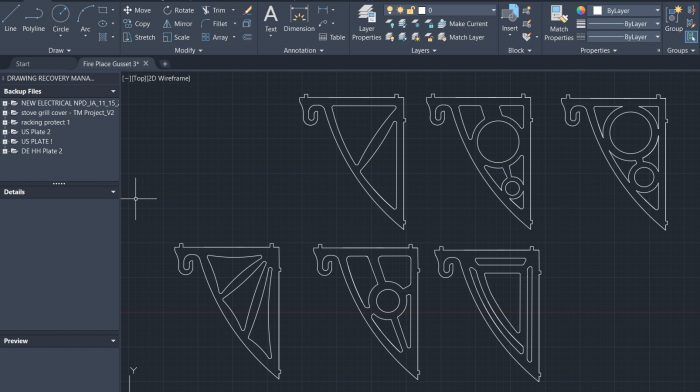
I am working on a steel and oak mantle for a customer with a 1970’s house that has painted brick and a fireplace insert. The customer is very particular about style and use and having every piece fit in with the age of the home and her overall furnishing aesthetic. She actually sat in my office while I drew up the initial proposal design and later tweaked my gusset concept a little.
Initial concepts for the gussets
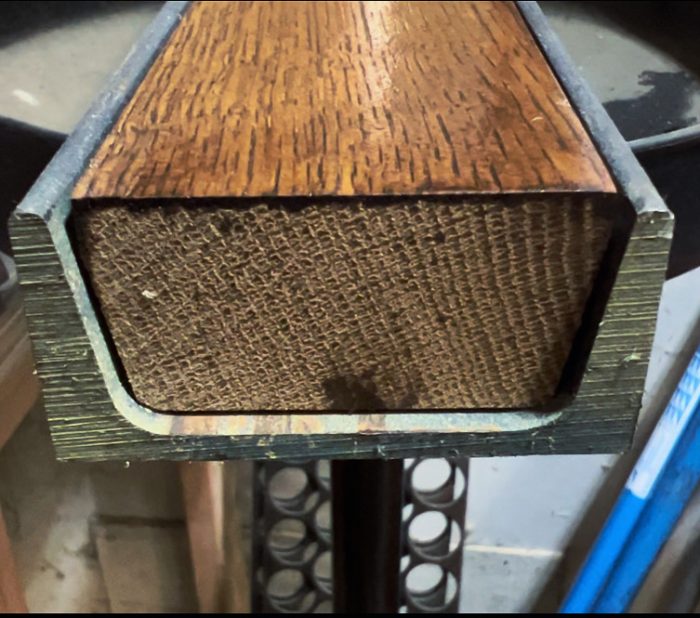
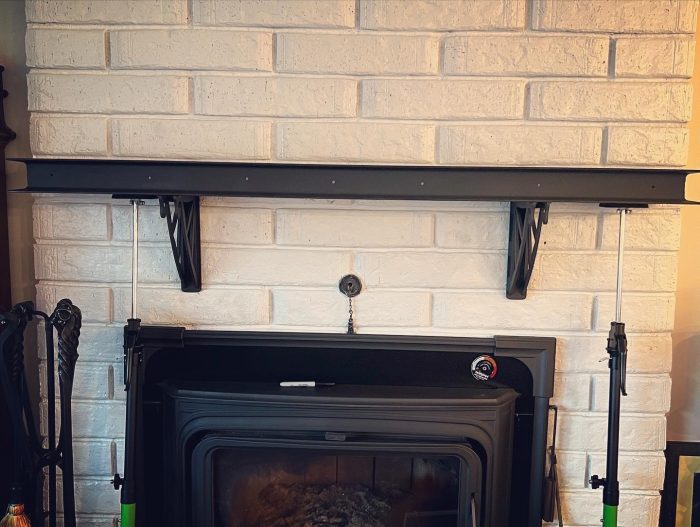
She wanted something industrial, but not too stark. Something that “would not be out of place in a mill or a factory at the turn of the 19th century.” Challenge accepted! I decided to go with steel c-channel and steel webbed support gussets, with a dark stained white oak rim inset that will match the antique French furniture in the room. At 9″ X 56″ X 3.25″ the mantle is heavy, weighing in at almost 70lbs. It will not be the focal point of the room, but more of a subdued matching and bonding detail – one that you could park a truck on 🙂
Test fit and customer acceptance reviewProfile of the fit check
The initial test fit went really well and I was given leave to move ahead with the final coat of paint, installation of the the lead brick anchors (there will be 5 – 5/16″X5″ lag bolts holding the mantle in place), and with the application of the oak rim, which will protrude 1/4″ out from the steel c-channel. The will be a 3″ ceramic fiber blanket inside the mantel to keep the top from getting hot when the insert is going full-bore on a cold February evening – no one wants cooked photos or melted candles.
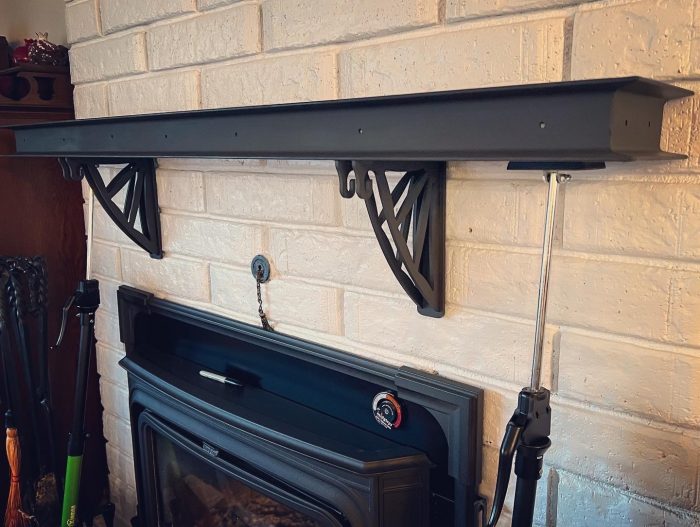
Christmas stocking bar hook detail
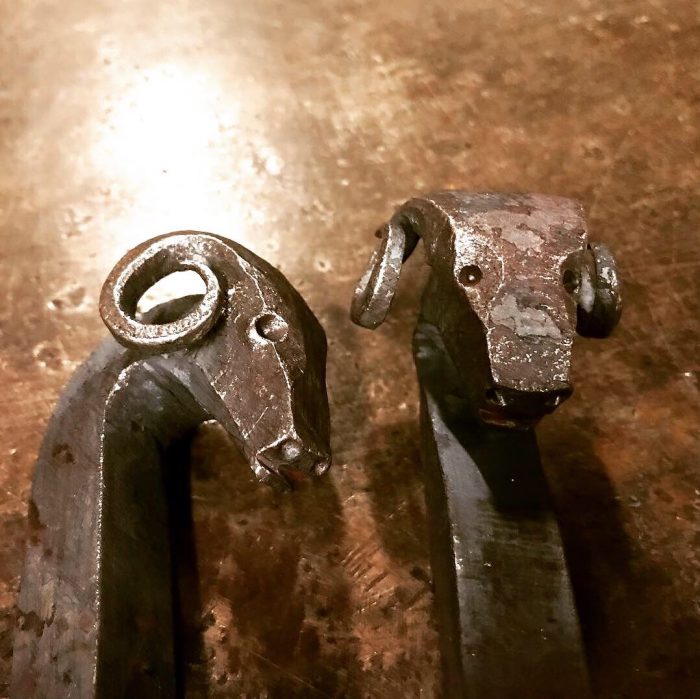
The backward facing hooks are a specific detail that was wanted specifically for Christmas stockings. There will be a hand-forged bar, with a Ram’s head end to match the fireplace set that will thread through the stocking loops. with the bar. All the stockings can be moved at the same time when there is a fire wanted during the holiday season. There will be forged hooks on the adjacent wall that the stockings can be hung on when the fireplace is in use. When the stockings are not on the wall, the hooks will be used for fireplace accessories like a broom and a small bellow set.
During the other 11 months when stockings are not present, the bar can be the base for other decorations like a fireplace screen or sash or garland and will look great just sitting under the mantle
Animal Figures on Fireplace Set and that will be on the stocking bar
As you might can tell, what started as a conversation about a “simple mantle” ballooned into an entire bespoke custom system, all driven by the customer and paid for before work even started. She is a long-time client that has my cabinets, some custom furniture, and many forged accessories, so I gently priced the mantel, the bar, hooks, and the installation at $2,700 and the check was written with a smile.
My friend and neighbor keeps losing his small 6-pack sized igloo cooler off the back of his bike. What is a picnic without a cold beer? He asked if I could help and make something to keep his cooler from sliding around. Why, yes I can! Let me put my enginerd brain to work!
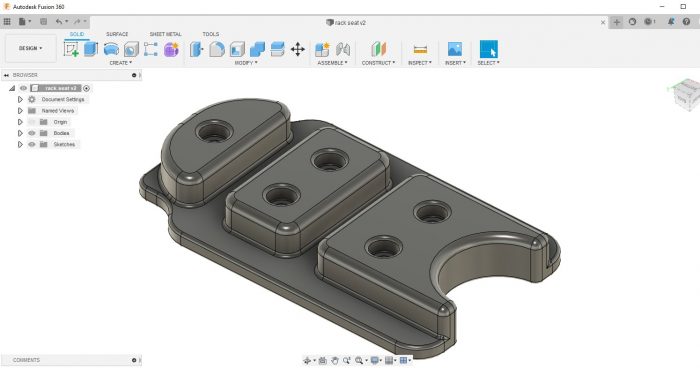
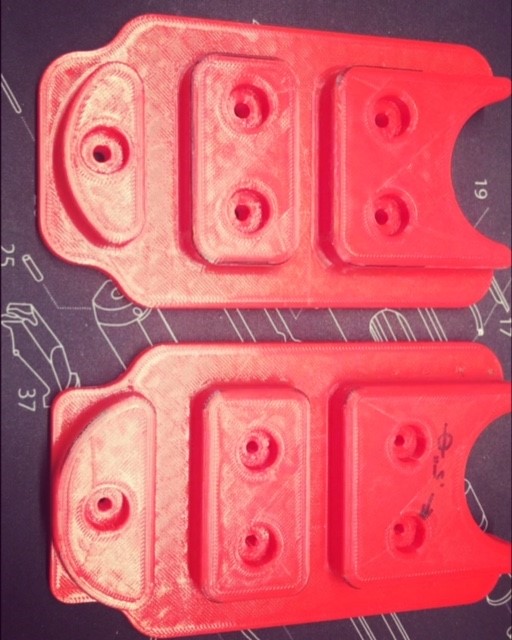
I made up a bracket in Fusion 360 that screws to the bottom of his cooler with pan-head machine screws and then printed my first prototype on a Creality 3Ds.
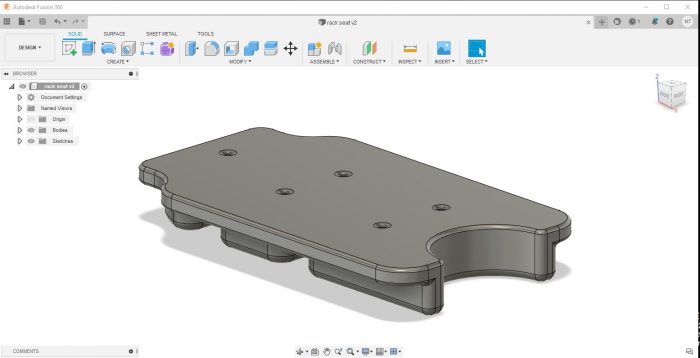
2nd version on top and test print on the bottom. Just a few little tweaks between the 1st printed prototype and the final version.
1st proto took about an hour to print. I changed a couple of the radiuses and a couple of holes sizes and did the final print with 4-layer walls/bottom/top and 45% honeycomb infill – my favorite for structural parts! No charge for the design or print. That is what friends are for!
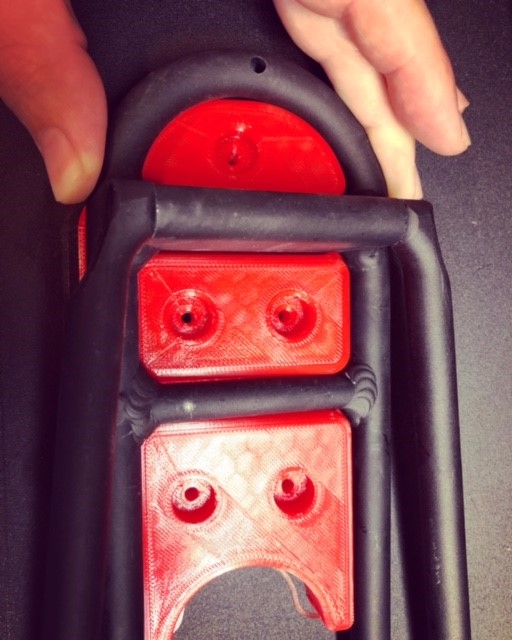
@nd and final print fits like a glove!
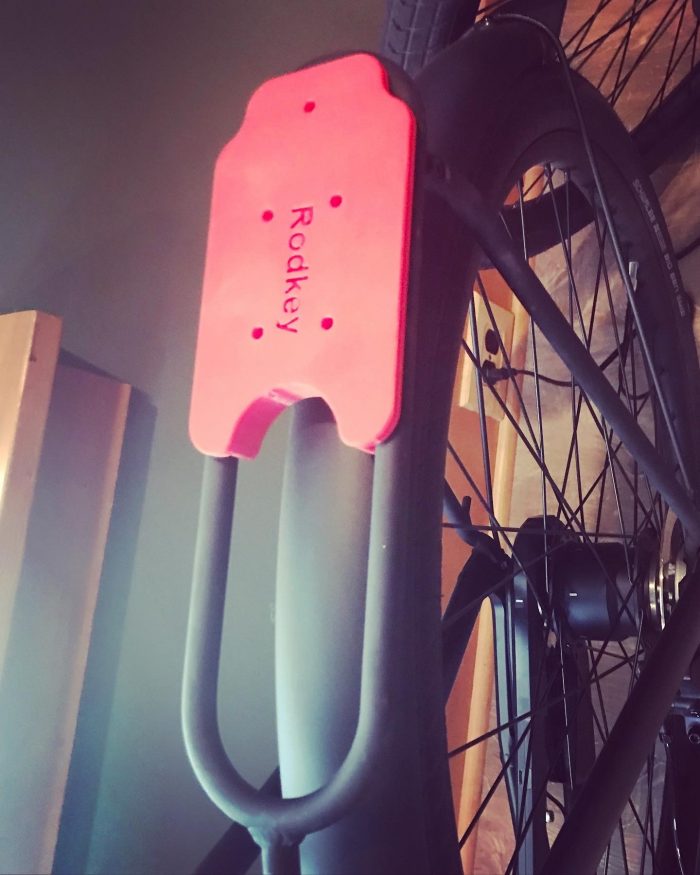
I added his name as a finishing touch. When screwed to the bottom of the cooler, it is held on the bike rack with a single bungie and there is room for food and gear between the seat and the cooler. It has been is use all summer and no reports of falling beer 🙂
I had a lower travel blade limit issue on my 1.75hp SawStop Professional cabinet saw and I couldn’t figure out the problem at first glance, so I went on-line to see it there was a known, common, or reported issue. I found very little in the way of identifying the exact cause or steps to take to fix it. There is a reported issue/fix for the industrial grade saw, but mine (the 1.75hp and 3hp are built with a different blade/motor carrier/lift) did not have any manufacturer videos that explained cause. I went off to the SawStop Forum, encountered a troll, may have said mean things to said troll, and may have been put in a forum time-out for suggesting that he ingest an entire satchel of Richards… I found the solution on another public forum, but no great pics or video was linked.
Anyhow, I thought I would video document and share the issue and fix in case anyone else goes looking.
I really love the peace of mind that my SawStop table saw has given me. I use it a LOT and it has been a work horse for me for over 5 years. 100% unsponsored in any way. Just really like this saw.
I stopped using cutting fluid with my
bandsaw a few years ago. I was complaining about the mess it made, and if any
of the guys in the machine shop knew of a better fluid, one that was easier to
clean off of concrete. A older machinist said that he hadn’t used fluid of any
sort in years, except in the CNC because a previous shop he was at used a wax
stick for material rough cutting. He had made the jump and hadn’t regretted it.
I tried it out, skeptical, but lo and behold it worked great. A little bit of non-peer
review testing over the years has shown me that the band saw blades last just
as long with the wax stick or the cutting fluid. I use the stick on my stationary bandsaw as
well as my portable, handheld bandsaws. Works great.
I have tried a couple, but the Castrol
140 Stick-Wax works the best.